There is a lot of stuff under the hood of your computer. Today I’m going to show you how you can find out exactly what is under the hood. Why, you ask? Well, first of all, it can come in handy when you’re talking with a tech support person over the phone. Another thing is that sometimes you may want to do an upgrade and need to find out what you’re upgrading FROM, and what you may be capable of upgrading TO. It comes in handy to have this information when you are troubleshooting hardware, maybe trying to find out if you need to get a fresh driver for something. All machines have this capability, but if you use Linux, you probably already know how to find this information. (If not, let me know, I’ll write up a How-To on it.) I’m presenting here instructions for Mac and for Windows 7. If you need a tutorial for Windows XP, let me know that too, I’ll put that up as well.
Let’s start with Windows, since the Microsoft platform is the most prolific.
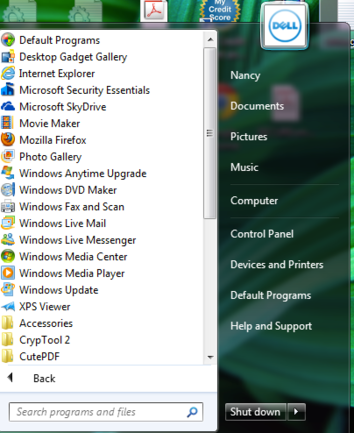
When you click on the Start “orb” down in the lower left corner, this is what pops up. In the right-hand column shown here, you want to right-click on the word Computer. That’ll bring up this:
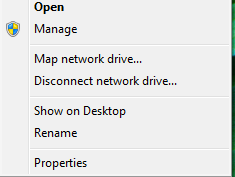
Select Properties. A new window will open up that looks like this:
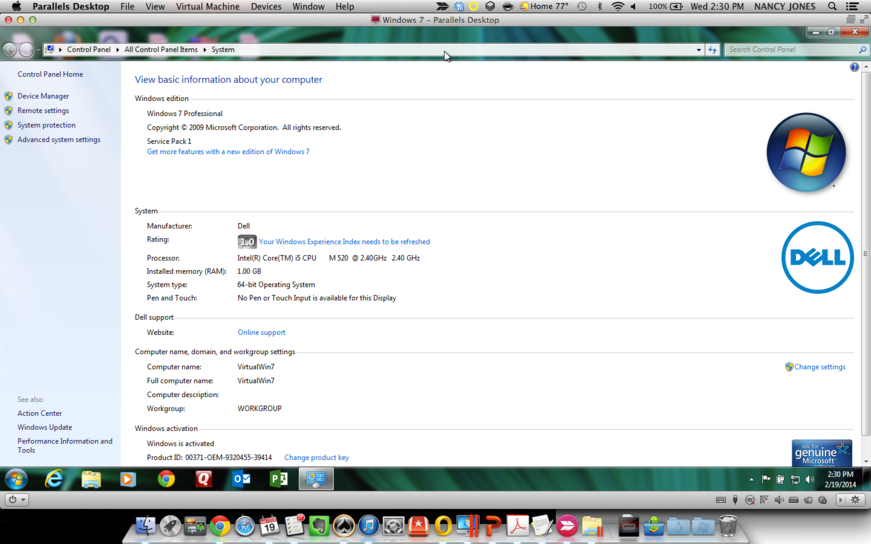
Just from here there’s a lot of information. You can see which version of which operating system you are using (in this example, Windows 7 Professional); which processor you are using (this is a virtual machine channeling the host computer’s Intel Core i5 processor) and how fast it processes. You can see how much RAM is installed and accessible, and the “accessible” part is important if you have a 32-bit operating system, which you can find out on the next line. A 32-bit operating system can’t work with more than 3GB of RAM, so that will explain why you may have 4 GB of RAM installed but only see 3GB. There is no limit to how much RAM a 64-bit operating system can USE–but there may be a limit to how much your system can actually HOLD. (Check out the post on RAM.) Since this is a virtual system, I only allocated a small amount of my installed RAM to this machine, since it isn’t going to be the one I use for heavy-duty operations. If that changes, I can allocate more, but that’s why on a fabulous machine with a Core i5 processor you’re only seeing 1 GB of RAM.
If you have a touch display of some kind, it will be noted here right below System type.
Support–you’ll probably NEVER use that, so we’ll skip over it. In all my years of tech support I’ve never known anyone who actually clicked that link. Go ahead if you want to, it won’t hurt anything, it’s just not the best place to get information; it’s very broad topics.
Now–What’s the difference between a “computer name” and a “full computer name?” The computer name is the identifier that was given to the machine at setup, and the full computer name is the computer name plus the domain name from two lines below, if your computer is part of a domain. If it’s a workgroup, like most home networks are, it will have a workgroup name, but your full computer name will be the same as your computer name. If you added a computer description at setup, or if someone else did, that will show up in that field.
Finally, at the bottom of that screen, you should see that Windows has been activated.
That covers the main field. Let’s look at the upper left corner:
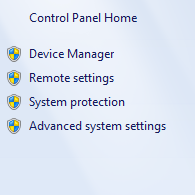
Click on Device Manager. If you haven’t turned off User Account Controls (and you shouldn’t do that anyway, unless something just won’t work with UAC turned on), you’ll see the shield in yellow and blue next to each item that is going to ask if you are sure you want to do that. And when you tell it yes, you’ll get this:
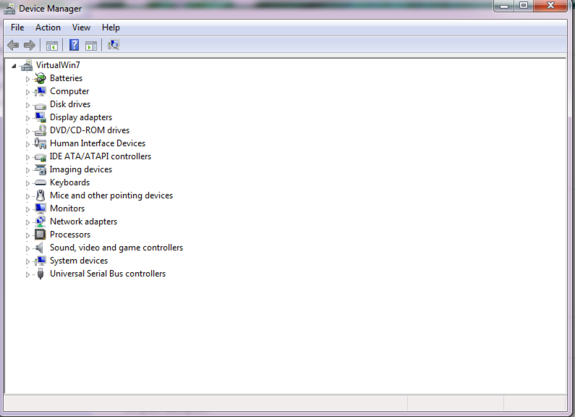
This is a really neat place to cruise around. You may learn a little about devices, and it’s here you’ll see if a piece of hardware is misbehaving. It will usually have some kind of mark next to the device name or icon. You can find the manufacturer of the hardware in your computer, as it identifies itself to the operating system, and you can find out what version and how old the driver is. (A driver is a little piece of software that acts as an intermediary between the hardware and the operating system.)
Now go back to the Start “orb”, click on it, and then regular-click on Computer. You’ll see this:
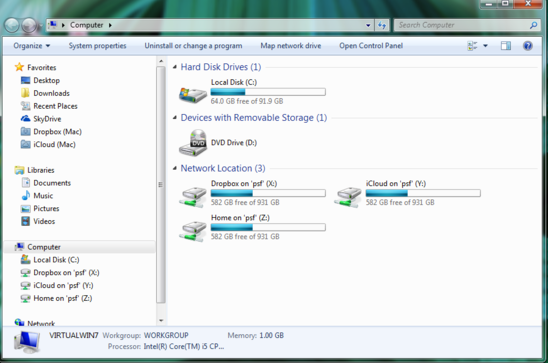
This shows all the drives connected to your computer, their usable size, and how much you have free. Since I’m looking at a virtual machine, we’re seeing the drive size I allocated to the virtual machine and how much of that allocated space I have used. This is a good place to go to find out if you need to defragment.
Now here’s how to do all that on a Mac:
Up in the upper left corner of the screen you’ll see an apple–surprise, surprise:
![]()
Click once on the Apple and you’ll see these options:
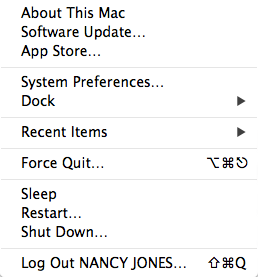
Click once on About This Mac, ; you’ll see this:
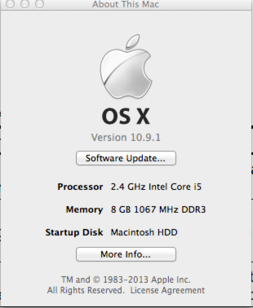
You can check for software updates from here, for any installed Mac-system software. And when you click on More Info…, you see this:
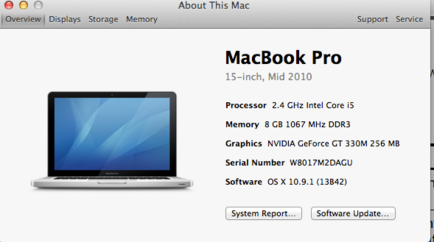
This is a general overview of your Mac. Notice the two buttons, System Report… and Software Update…You can use that button to get software updates, it does work; but it’s an extra step if all you’re doing is system updates. However, if you needed to find out what version of the operating system you use (OS X 10.9.1 shown here), and you found that you could grab an update to the OS, you could do that from here. The System Report button will give you some real meat to chew on:
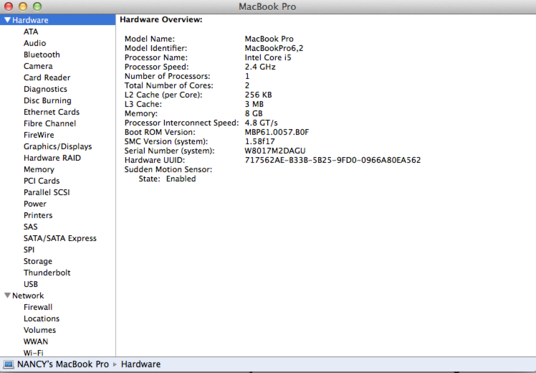
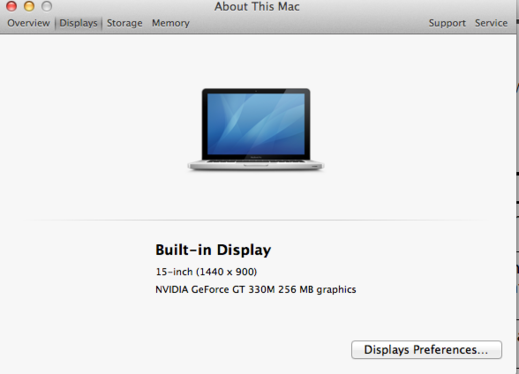
This is the Mac version of Device Manager, everything in the computer is laid out along the left column, and details about each item present into the center. When you close that out and go back to the overview, there are three other tabs: Displays, (In the preferences button you can customize a couple of things, but unless you’re a graphic artist I recommend staying out of there!)
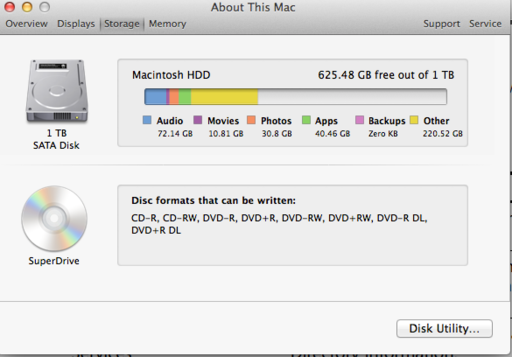
Storage (very cool visual presentation on not only how full your disk is, but how it’s filled),
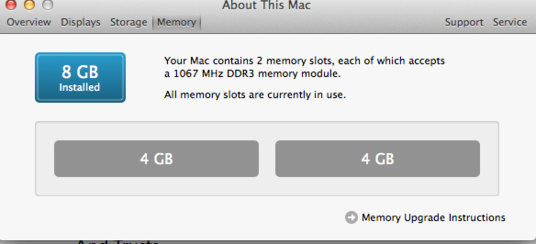
and Memory (Mac has made it easy to figure out if a RAM upgrade will be possible and beneficial):
I recommend that you explore whatever system information tool your computer uses. It will help you get familiar with terminology used in computing, and it will give you a tool for helping your technician help you.
Did I leave anything out? Drop a comment in below and let me know.