Rule Number One: Don’t get infected.
But if you do, follow Rule Number Two: Clean it off your system immediately.
If you read my post on CryptoLocker, you’re aware that it’s not always just that easy. Without a good backup you run the risk of losing everything, and even with a good backup, you’re in for a lot of work.
The baddie called CryptoLocker was mostly taken down recently, but nature abhors a vacuum, and several samples of “ransomware” have already popped up to take its place.
But what if–imagine this–what if you could clean off the malware that started the crypto-crap, and then recover your files? One of the podcasts I listen to has successfully assisted one of his customers in doing just that–not entirely, mind you, but for the most part, and without paying the ransom. This is something you really need to learn how to do anyway, just because it’s one more layer of redundancy in your file storage. I want you to learn how to use Previous Versions and System Restore, and I’ll take you through the whole process. While your system is running well, get this in place, and then test it. Then if it comes down to knowing how to do it, you’re ready.
Let’s start with System Restore, because you should be using this anyway. I’m going to assume you’re running Windows Vista or later, because you should really not be using the internet with Windows XP. It kinda sorta can be done safely, and if you take ALL the precautions I outlined in my post on doing so, you shouldn’t get infected; but if you’re using Windows XP, you cannot afford to not have a backup. All my illustrations will be from Windows 7, but if you need instructions on other versions, just ask.
Click on the start orb, and this pops up.
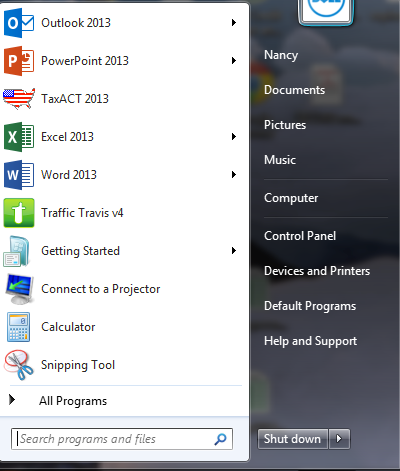
Right-click on Computer.
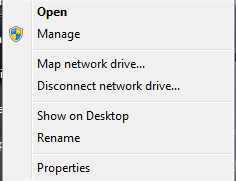
Select the one at the bottom, that says Properties.
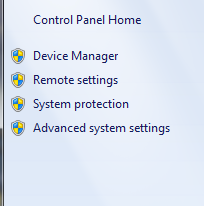
Over in the left, against the light blue field, select System Protection.
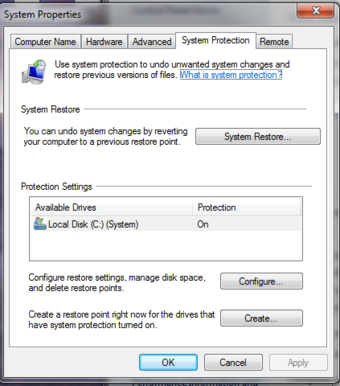
The first thing we need to know is if System Protection is turned on; you see above that it IS on. Below is what it looks like if it is NOT on:
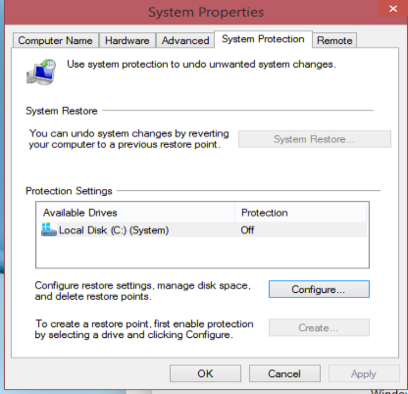
Click the Configure…button.
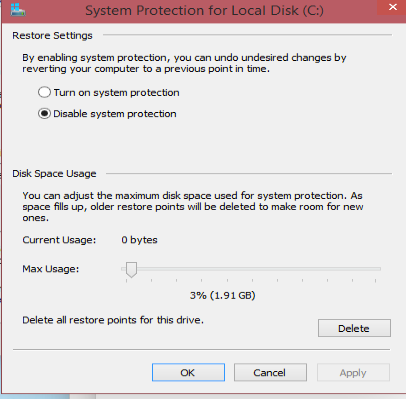
Then click the radio button that says “Turn on system protection.” That’s all there is to it. Your system will now start creating restore points and saving files and settings.
Now, if you need to revert to a previous set of settings, you’ll go back to the System Properties page and select System Restore.![]()
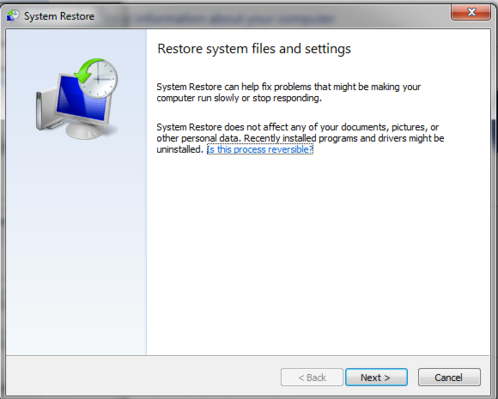
Click Next. You’ll see a list of restore points that Windows has created, or you’ll see an empty list, if System Restore is not on.
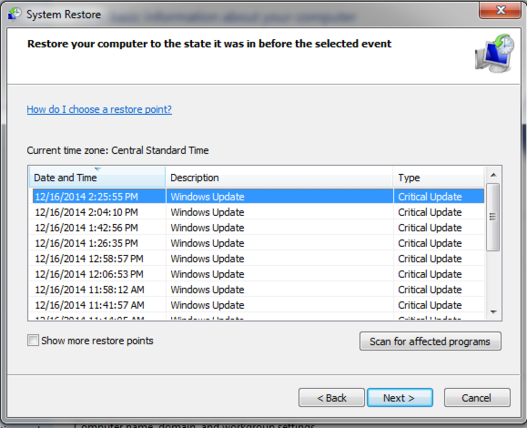
I ran a lot of updates, and Windows creates a restore point every time it runs updates–IF SYSTEM RESTORE IS ON. So as long as you have it on, and keep your system updated like you should, you have some restore points. If your machine is unstable because of some configuration change, you can use System Restore to try to bring it back to a state before the configuration change. But here’s the really cool part–if System Restore is turned on, it is saving versions of your files! Now, what that means after a crypto-infection, is that you can probably restore a previous version of that file from a time before the infection, and it will overwrite that encrypted file. BUT–YOU MUST GET RID OF THE MALWARE FIRST!!
So here’s how to restore a hosed file–and this should also work with a file that somehow got corrupted. It happens. You can close out of all the System Restore windows, we’re moving to a different part of the system now.
Click once on the icon in your taskbar that looks like a file folder, and you’ll see your libraries.
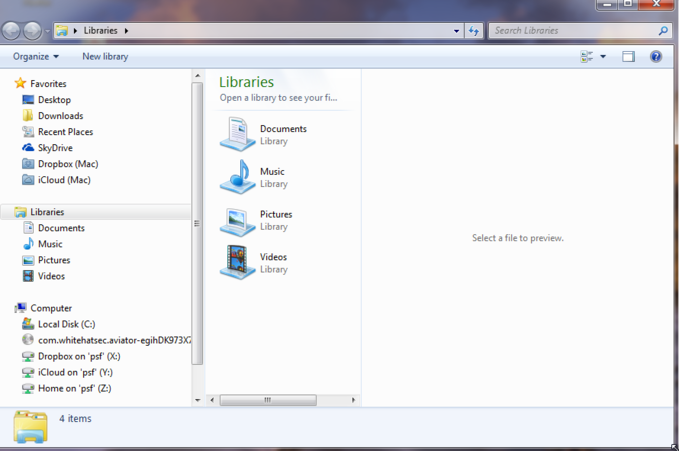
If you’re only working with one corrupt document, navigate to that document, and click once on it to highlight it.
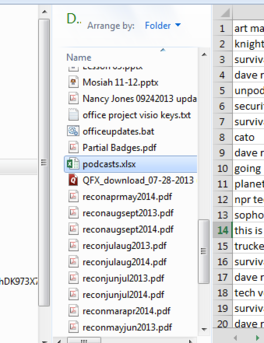
Right-click once on it.
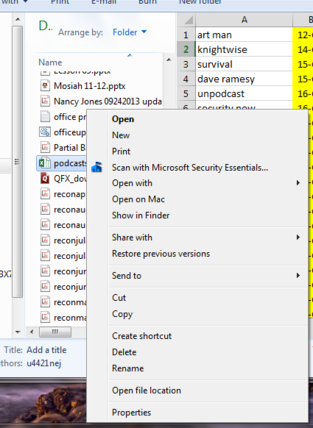
From the bottom of the list, select Properties.
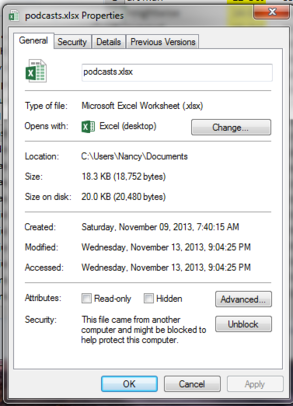 Select the tab that says Previous Versions.

This shows all the times that file was saved. Here’s a caution: If you create a file and never change it, System Restore won’t have one available for you to restore. But when you select the file to restore, then click the Restore…button, you will get a notice that if you do this,it will overwrite the currently available file. It takes a minute or so, depending on the size of the file, but it’s done!
You can also restore a whole folder, which is what you’d want to do to get your pictures or music back, but you’d be missing any changes or additions since the last version. The process is the same, only instead of navigating to the file, you’d navigate to the folder, and select the folder properties.
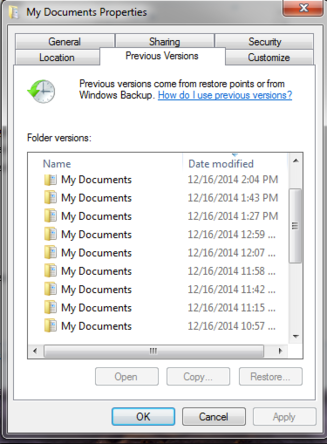
Then you select the version you want to restore. It also works for any files you store on your desktop, but you can’t do it by selecting the Desktop Folder from the Libraries pane, it won’t show any previous versions. You need to navigate it this way: C:\Users\<your user name>\Desktop. Then you’ll see this, select Previous Versions, select the one you want, and select Restore.
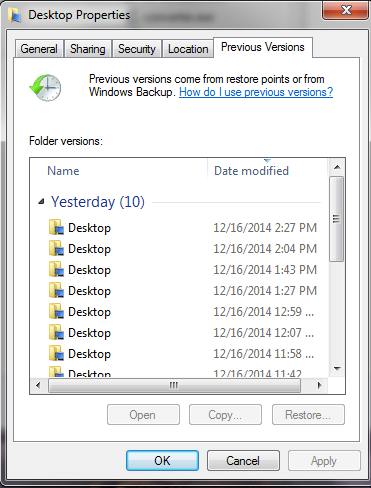
Remember that you will lose any changes that you have made since the last restore point, and it may take a couple of tries to find the version that pre-dates the encryption. But having System Restore turned on is a good thing anyway, and losing a few files is so much better than losing everything. This method is in no way any kind of substitute for a good backup plan!!!!! (I hope I’m not being too subtle on that.) It was never designed as a backup plan, it was designed to provide an opportunity to revert to a previous state if, say, a software installation goes bad, or you make changes to a file that you really don’t want to have to undo all of, or can’t undo all of. Also, we do know that just about the time we think we have a solution for the bad guys’ antics, they figure a way out to nullify all our efforts. So again, don’t let this fool you into thinking you don’t need a backup. Get familiar with System Restore, make a good backup and give this a test run before you absolutely need to rely on it. Let me know how it worked out for you.